15 September 2022
This Post covers BOTH a Low-Maintenance Balayage on Curly hair tutorial
and a 2nd Video specifically for Curly Mixed Race Hair — So 2 Videos :
First ONE :
Today, I’m going to show you how to do a Low-Maintenance Balayage on curly hair using all kenra color. This is my model Kristen and it’s been about a year and a half since she’s gotten her hair color done — and she’s really looking for something that’s low maintenance as well as versatile, because she really likes wearing her hair curly and straight.
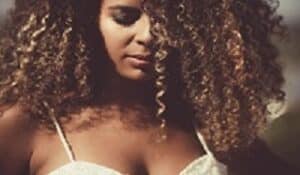
What we’re gonna go in with is Demi-permanent hair color, so she has a soft line of demarcation as well as ‘open hair painting’ to brighten up her overall look (using all counter color for this project). I will be using 2 formulas, simultaneously. The first one is Blonde Clay Lightener at a 1/2 mixing ratio, with 30 volume developer and the 2nd one is kendra color demi-permanent 6 and at a 1/2 mixing ratio with 9 volume developer.
For my models hair, i will be utilizing all zigzag partings, so using her center part. I just took a SIG’s X section, all the way down the center and then brought another zigzag section from the top right back down to her ear — and in the very back starting right at the occipital bone, I took another deep zigzag section — and then I clipped the remainder of the hair away. For my application, I’m starting out by applying the 6 and demi-permanent formula at about 2 inches onto the roots — and making sure to thoroughly saturate.
So that way we have a nice rooted effect and also a natural effect, considering she is a Natural level, 6 7, and this is just going to richen up her hair color .. and also make it super low-maintenance, since it’s so close to her natural hair color. Since we are going to be doing some hair painting, I really want that hair painting to exist on the exterior right at this bottom.
So I just brought that 6n color all the way down through the Center, and so now I’m going to apply my Clay Lightner to the exterior. So I just combed that demi-permanent color right on down.. and I’m gonna hair paint onto the surface and make sure to thoroughly saturate the surface as well as the ends — then I’m also going to apply the lightener on the underside.
So this way, if she does pull her hair up and into a Ponytail, she will have some nice pretty lived-in highlights throughout the back. I’M just gonna complete the other side, and I comb down the Demi-permanent with a wide tooth comb and then I’m starting to apply my Lightner on the underside first (and then working on thoroughly saturating the surface of each side) — and then really working that product right on in throughout the ends.
Once I was done with the section, I then took another 2 to 3 inch zigzag section right on top of the occipital … and again I’m repeating the same process of putting the six end demi-permanent right onto the first two to three inches of new growth (and now I’m going to work on splitting these sections up.
So really. The goal here is to create some really thick chunky pieces for my balayage pieces, but I want to make sure that I have the depth in there. So the highlights can pop, I’m adding in 6n and pulling that all the way through on 2 of the pieces inside ( on this particular section). I have a total of 5 sections and they’re rather chunky.

So what the END RESULT will be is that when these curls are gathered together, when she wears her hair curly they’re really going to be isolated and pop, but still gives that subtle highlight effect. Because we are doing that surface hair painting the other cool thing about this technique is that when she wears Her hair straight she’s still going to have a nice pop of brightness throughout the exterior ( because that’s where we’re really focusing on the hair painting).
Yet it’s also going to give a nice subtle, lived in effect that’s super low-maintenance because we are doing that open-air hair painting . I’M going to continue to take the same zigzag sections and then split those sections into more subsections — so the width of these are completely up to you. But right on the widest part of her hair, I have about five to six sections here. So just kind of be mindful of where exactly you want to apply the depth. For me the depth is always going to live right behind where I want the lightest pieces to live.
So since again, I am really focused on lightening that exterior. I want to make sure that that 6n lives right behind it.
So as I move towards the top of the head, there’s going to be a little bit of that 6n overlapping on top of (or underneath), or on the side of each of my hair-painted pieces. Now, once I get toward the top, I’m going to take a triangular section or a diagonal section, and I’m still applying that 6n on the interior of that triangular section.
Then I am hair painting the exterior and then for the very top of the section, I’M just going to bring that hair all the way down, comb through that 6n & still hair paint that surface, because that’s where I want most of the brightness to live; once I get to the sides, I’m just going to isolate with another zigzag section ( that first Half an inch /2 inch of hair line ) & then take another zigzag session horizontally and then working in that seam pattern, because we’re working in the front.
MORE on Hair Painting: VIDEO on Balayage for Curly Mixed Race Hair
(A Very Important Part of Above is Going with the Natural Flow of the Hair )
I want the most brightness again to be on that exterior and towards the face. So I’m taking that 6n and making sure to apply it (that inside section)… and then for the very front hairline, I’m not bringing that six as far down as I did in the back, I’m just kind of tapping it in and then I’m going to Hair Paint away from the face; so a quick little tip, is to hold the hair literally right off of the head (nice and taut ) – and hold your brush parallel to the hair and hold the hair, nice and taut as you’re working with it.
For that very front piece, I’m just holding the hair, nice and taut right off of the scalp & with lots of tension and even application, I’m thoroughly saturating that surface and then placing the hair right on down and then taking another zigzag section horizontally (making sure to apply that six and right behind that hairline piece).
So in this particular section I made 3 subsections and am only applying Lightner to that middle section .. and then for the very top, I’m going to split this section up with diagonal sections.
So these are all going to be diagonal forward sections and I’m starting off with the 6n demi-permanent & alternating with six and right into the lightener — and then 6n and Lightner. The purpose of the 6 blended into the lightener is so that way, there is a nice soft blend and a soft line of demarcation (as she’s processing), resulting in lower maintenance balayage.
Now that we’re all done with her color application, we’re gonna process her room temperature for about 20 minutes — and then get ready to do her final glaze. Since we lifted Kristin to a nice solid level eight, she does have a little bit of warmth, but I want to enhance the warmth (yet also control some of it as well), which is why I’m gonna go in with equal parts of 8gb.
So has a nice beige light reflection which will help with the coolness & then nine PV, which is a pearl violet which will help control some of that goal. And then I mix that up One to two, with nine volume developer and then I processed her for 15 minutes to style. Kristen’s curls, I’m applying moisturizing oil right onto her wet hair first and then am applying a generous amount of a curl-defining cream ( and really focus on Raking that through the mids and ends ) — and then finally applying it to her roots.
Wrapping UP :
Once I was done applying the product, I set my dryer to a high heat and low setting with a diffuser — and now I’m just going to patiently dry her hair for about 15 minutes .. (the final result on how to do low-beam and foliage for curly hair). So, just to recap, we went in with demi-permanent 6n at a 1/2 mixing ratio — with nine volumes developer – and then hair painted a Simply Blonde clay, Lightner at a 1/2 mixing ratio with 30 volume developer … and then processed her for 20 minutes. For her final Glaze we went in with 8gb with a little bit of 9 PV at a 1/2 mixing ratio – with 9 volume developer and processed her for 20 minutes.
So I really hoped you liked these 2 video tutorials. See you next time ! 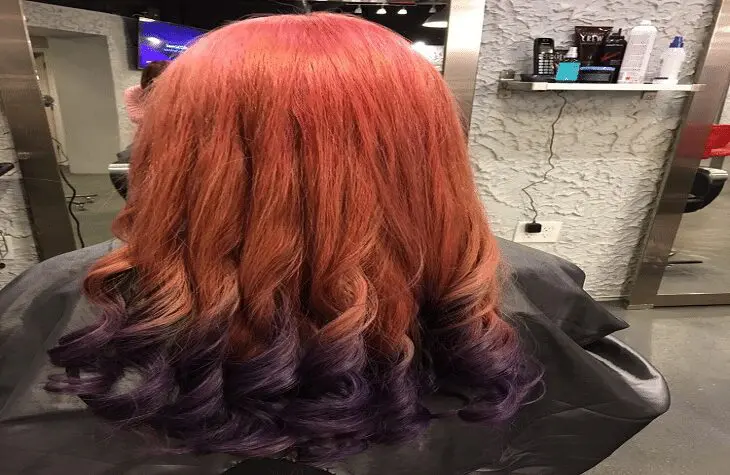
Thanks for visiting Philadelphiahairsalons.com